This section will cover how to permanently install install using a internal modchip
Credit: https://neburone10.github.io/ Rubén Ríos.
CAUTION
Baikal system is not recommended because of incompatibilities with the internal install
Requirements:
Basic soldering skills
Soldering iron
Solder
Wire (Its recommended flexible stranded wire, here is used 0.75mm diameter including plastic insulation)
Thermal tape to insulate the wires and chip to avoid shorts
LuckFox Pico (bigger model can be used allowing integration in the space found, but only when not using the specific fork of the original project)
Usb stick
(Optional)MicroSD card of 8GB or higher
Video tutorial here by MODDED_WAREFARE. His tutorial is a bit different though.
Step 1 - Software side
For this you will need this project here. The offical/original will not be used because its missing key features that make this mod viable. Those features being SPRAY_NUM and CORRUPT_NUM.
Then you will need to download neccesery files.
Internal linux install already present.
NOTE
It is recommended to use Windows, as the process is easier. However, if you are able to do this on Linux, please open a pull request, as I am not aware of the necessary software being available for Linux.
For information on how to flash a luckfox pico, visit the luckfox wifi and select the page corresponding to your luckfox model. Also make sure to always click on "System Image Flashing" section on their wiki.
Next make sure you download the RK DriverAssitant and SocToolKit flashing tool.
Install the RK Driver and Extract the SocToolKit.
After that Hold BOOT button on Luckfox → plug USB-C into PC. Device will show up as “Rockchip” in Device Manager.
Open RKDevTool / SDK Toolkit, then choose the Pico Plus Flash firmware(or the firmware for you specific luckfox) you downloaded and tick every box and wait for it to finish.
Unplug & replug Luckfox, new network adapter appears so set it to a static IP.
Open MobaXterm (or any SSH client) open a new session type in your ip that you choose for luckfox. Exmaple = IP: 172.32.1.93. The user is root and password is luckfox.
Clone or drag-drop the exploit repo also remove the "-main" from the name
cd /root/ps4-persistent-boot # or whatever folder name, ./install.sh
Before configuring the exploit download the ps4 linux payloads from here and place the neccesery payload to the root of your usb stick.
Now once all is finished you can safely configure your luckfox and use linux
Step 2 - Physical modification
For the board configuration, refer to the repository: https://github.com/0x1iii1ii/PPPwn-Luckfox. Note that when using this board, ethernet pins 4, 5, 7, and 8 need to be connected to GND for the router to recognize it, as seen in issue https://github.com/0x1iii1ii/PPPwn-Luckfox/issues/7
Regarding the Ethernet connection, the example images show different wiring colors because the creator lacked the correct colored wires to demonstrate it properly. For the PPPoE connection used by the PPPwn exploit, only 10/100 ethernet is needed, so 4 wires are sufficient. This diagram shows the pins we need
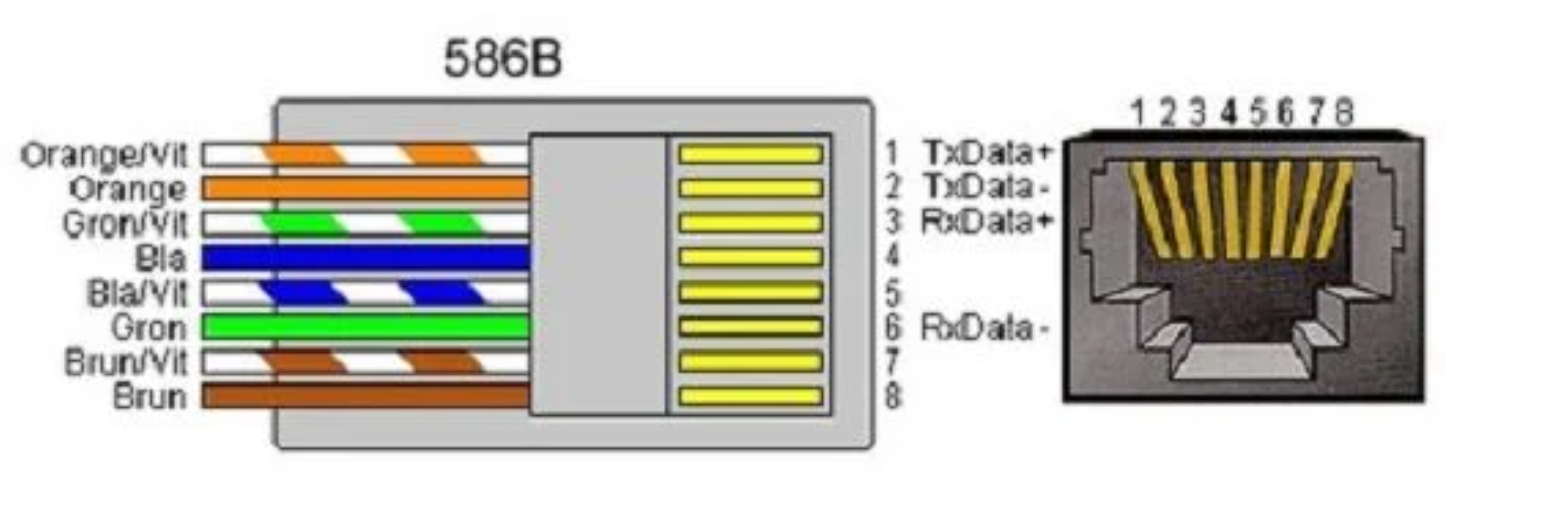
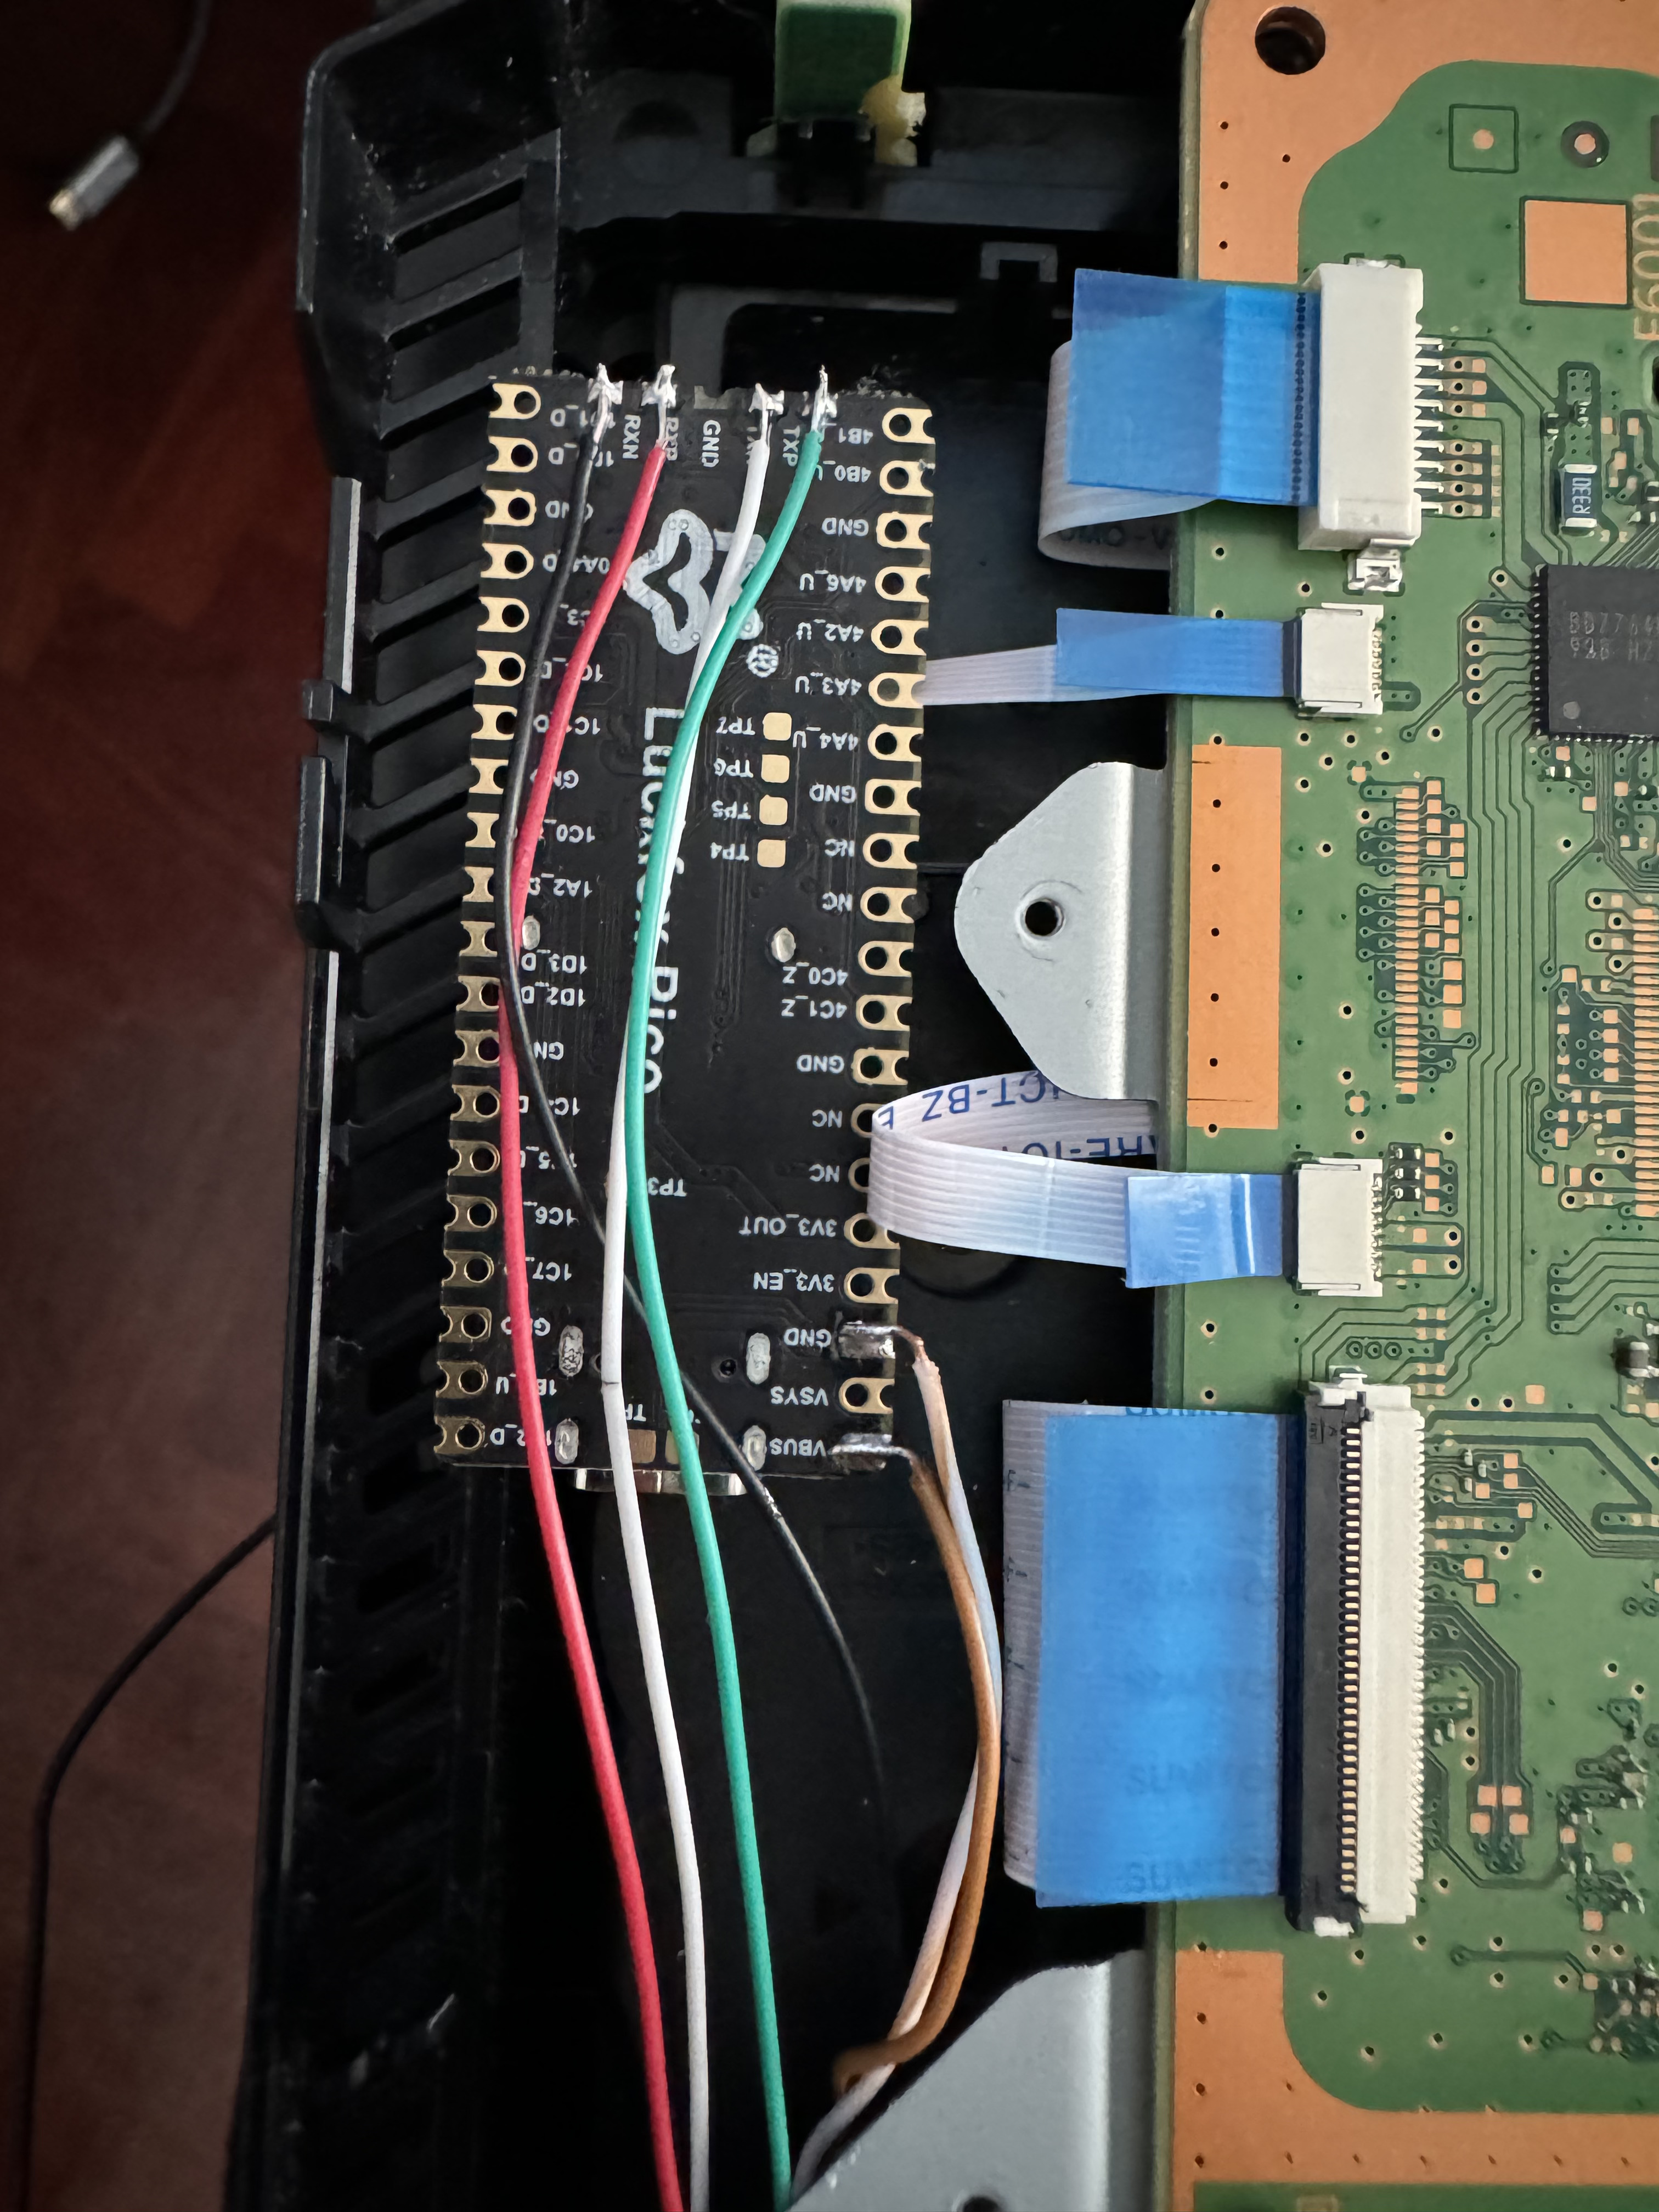
As you can see, only TxD+, TxD-, RxD+, and RxD- are needed, and these should be connected to the LuckFox board on pins TxP, TxN, RxP, and RxN respectively from the following diagram.

For power, although the board can be powered via USB-C, it is also possible to do so via the VBUS and GND pins, corresponding to numbers 40 and 38 in the previous diagram.
With the connections clarified, the only thing left is how to route the cables so they don't interfere with the metal plates or plastic covers.
NOTE
These images are taken from the internet, ignore the condition of the motherboard, the important thing is what is marked in each case with the red circles.

- Side A(Image above)
- Side B(Image above)
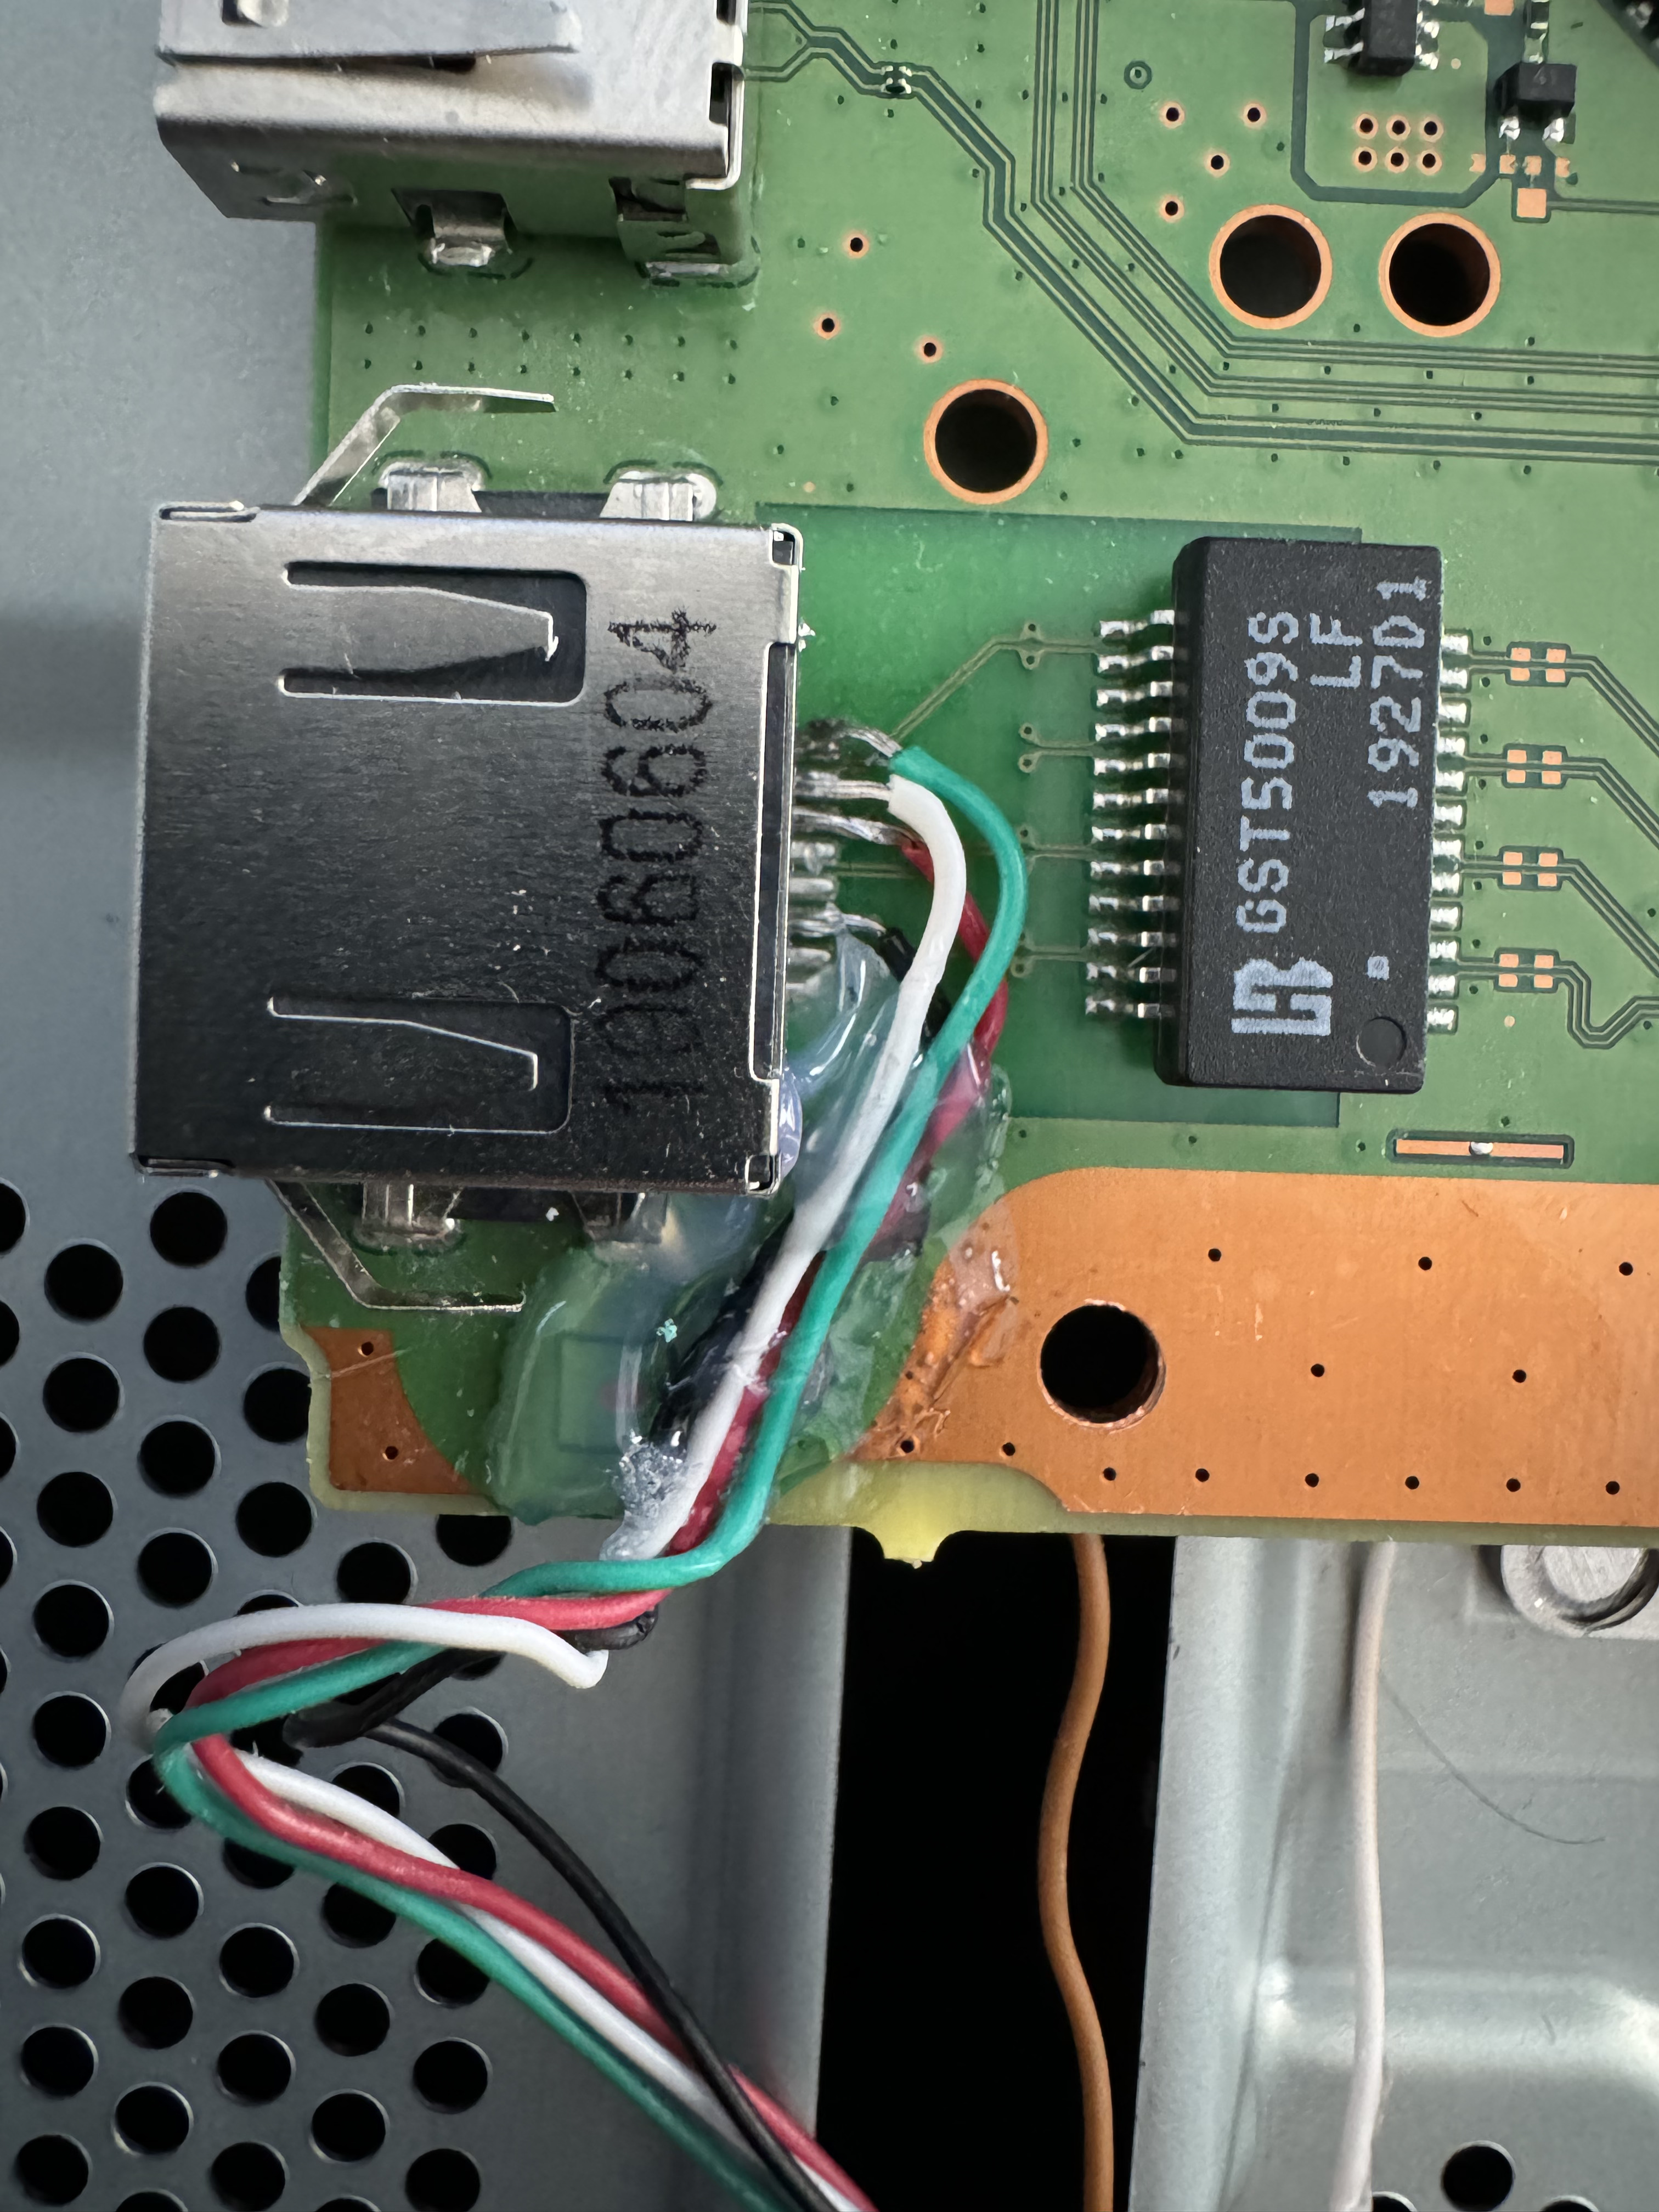
On side A, we have the ethernet connections, following the diagram shown earlier it would look like this:
NOTE
These pictures we're taken from his own console
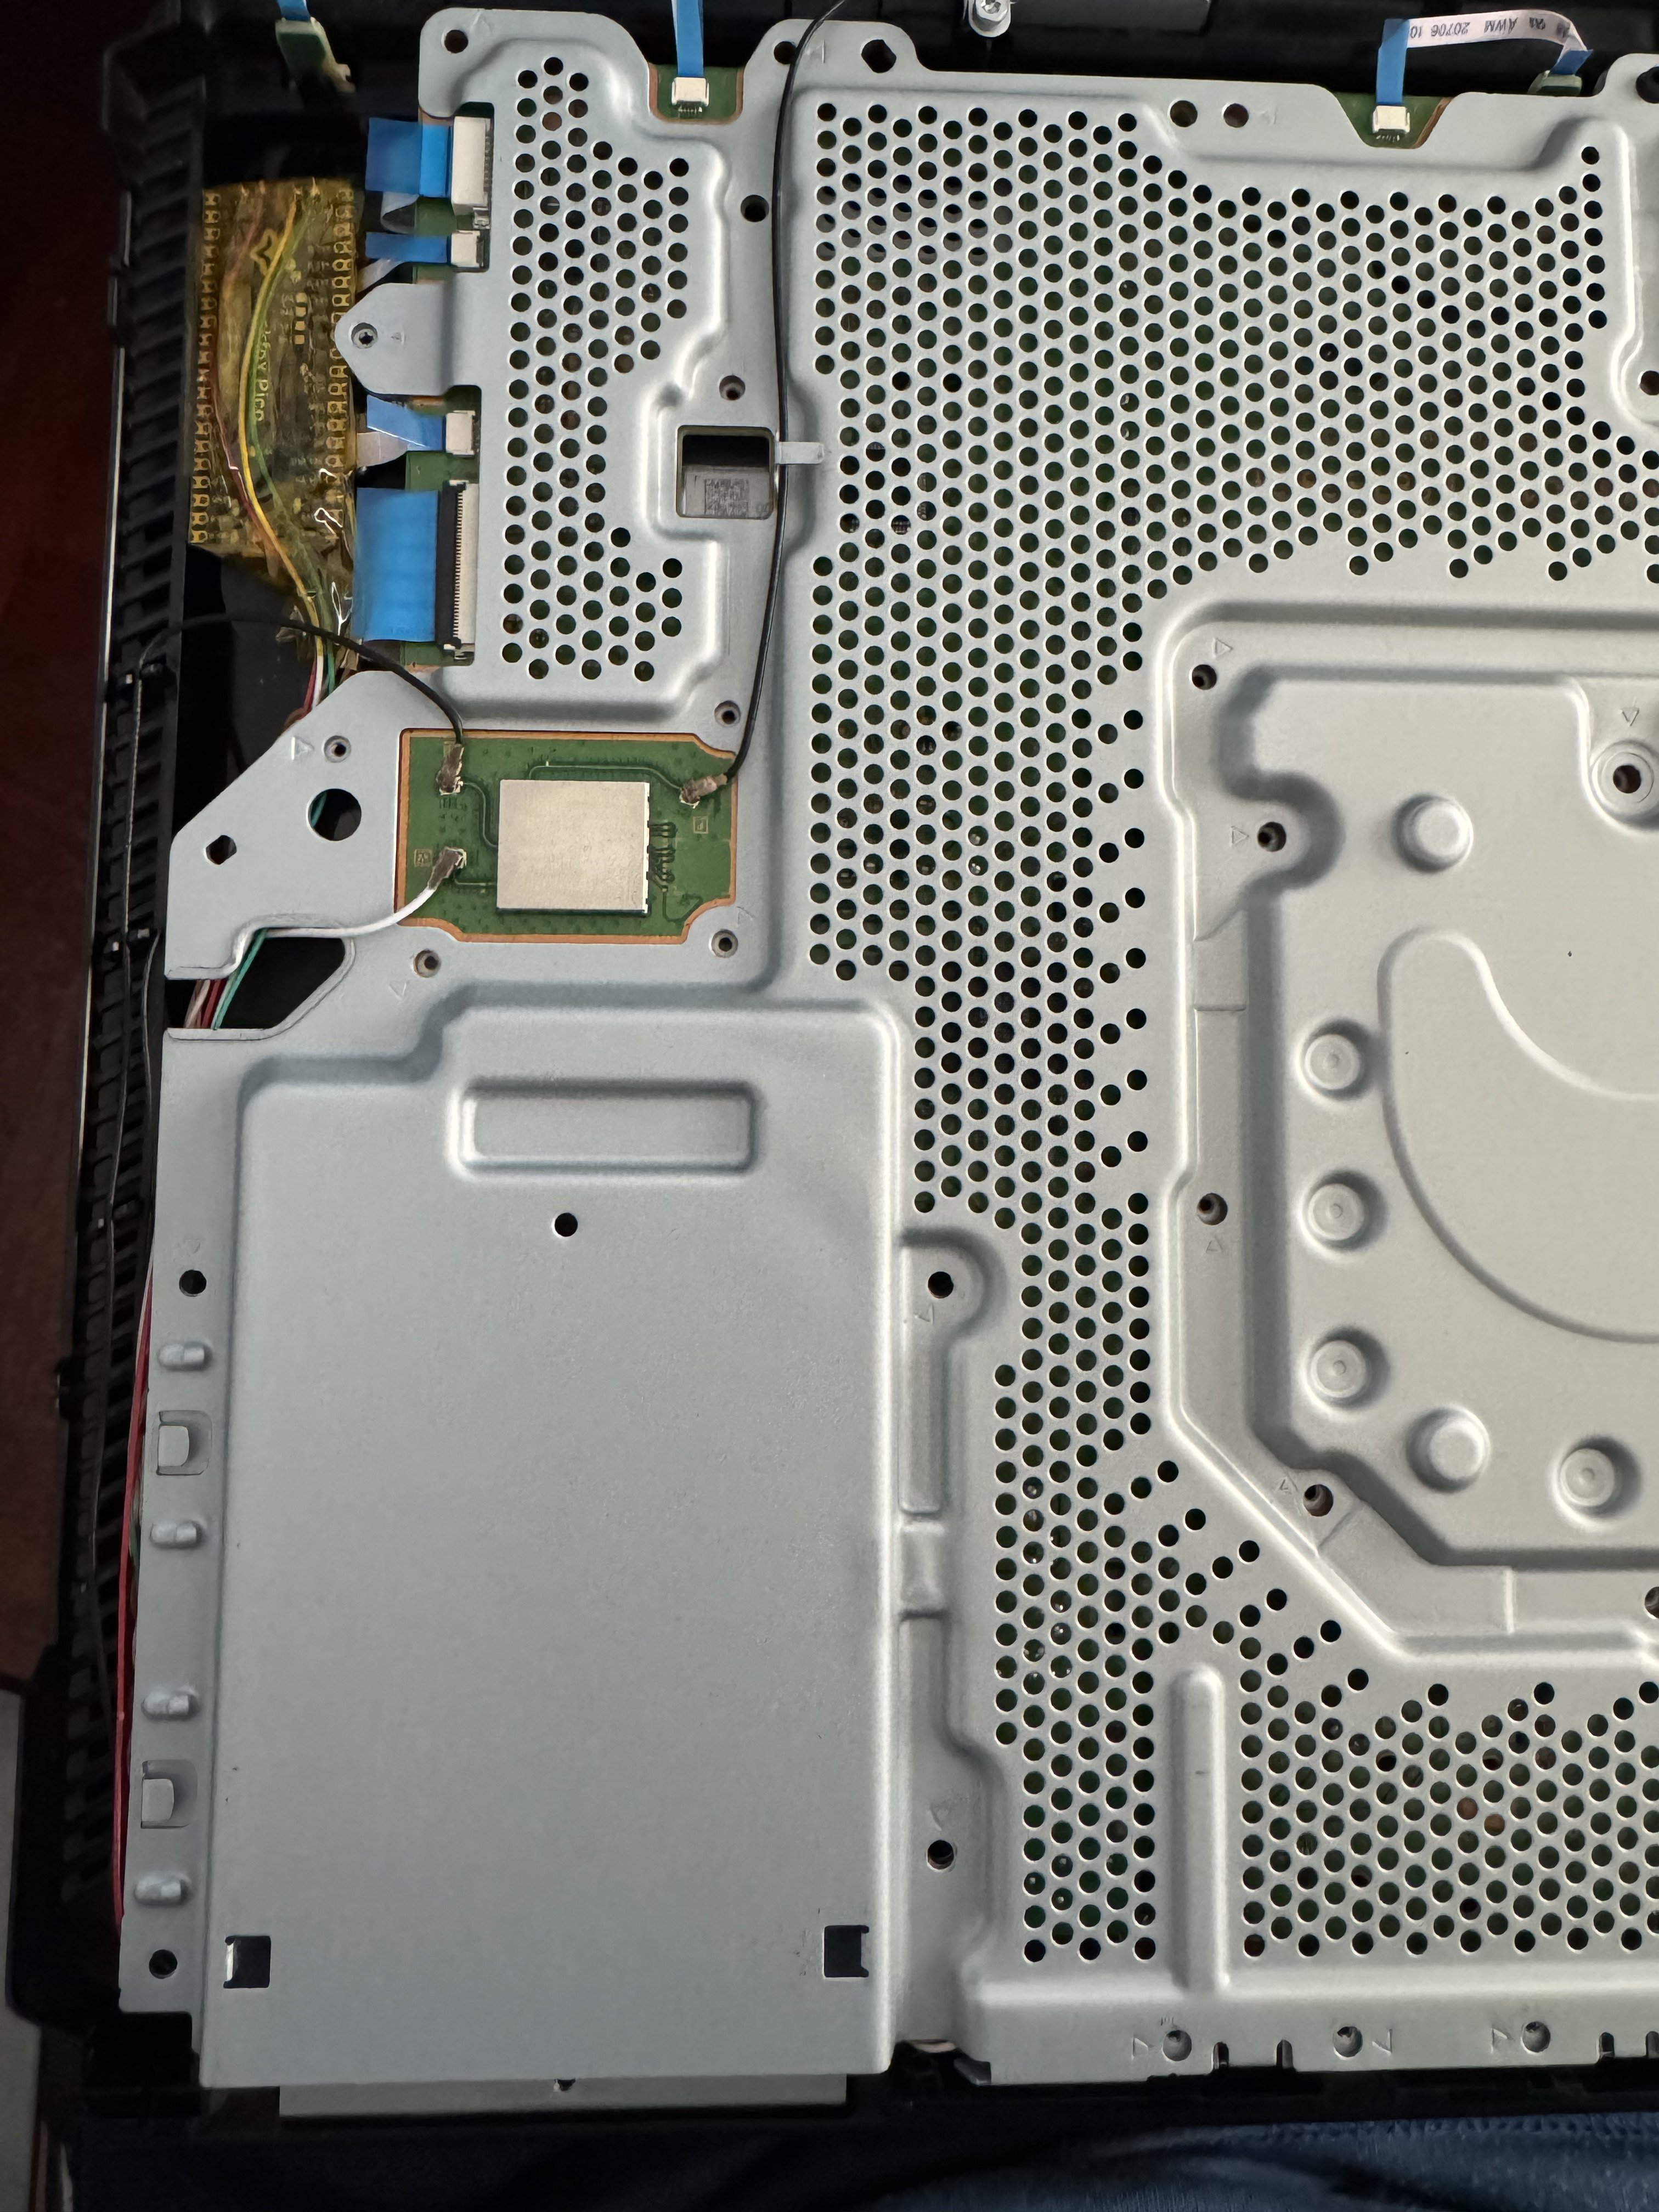
The wires are secured in this area with hot glue so they wouldn't move and thus not interfere with the metal plate above the motherboard.
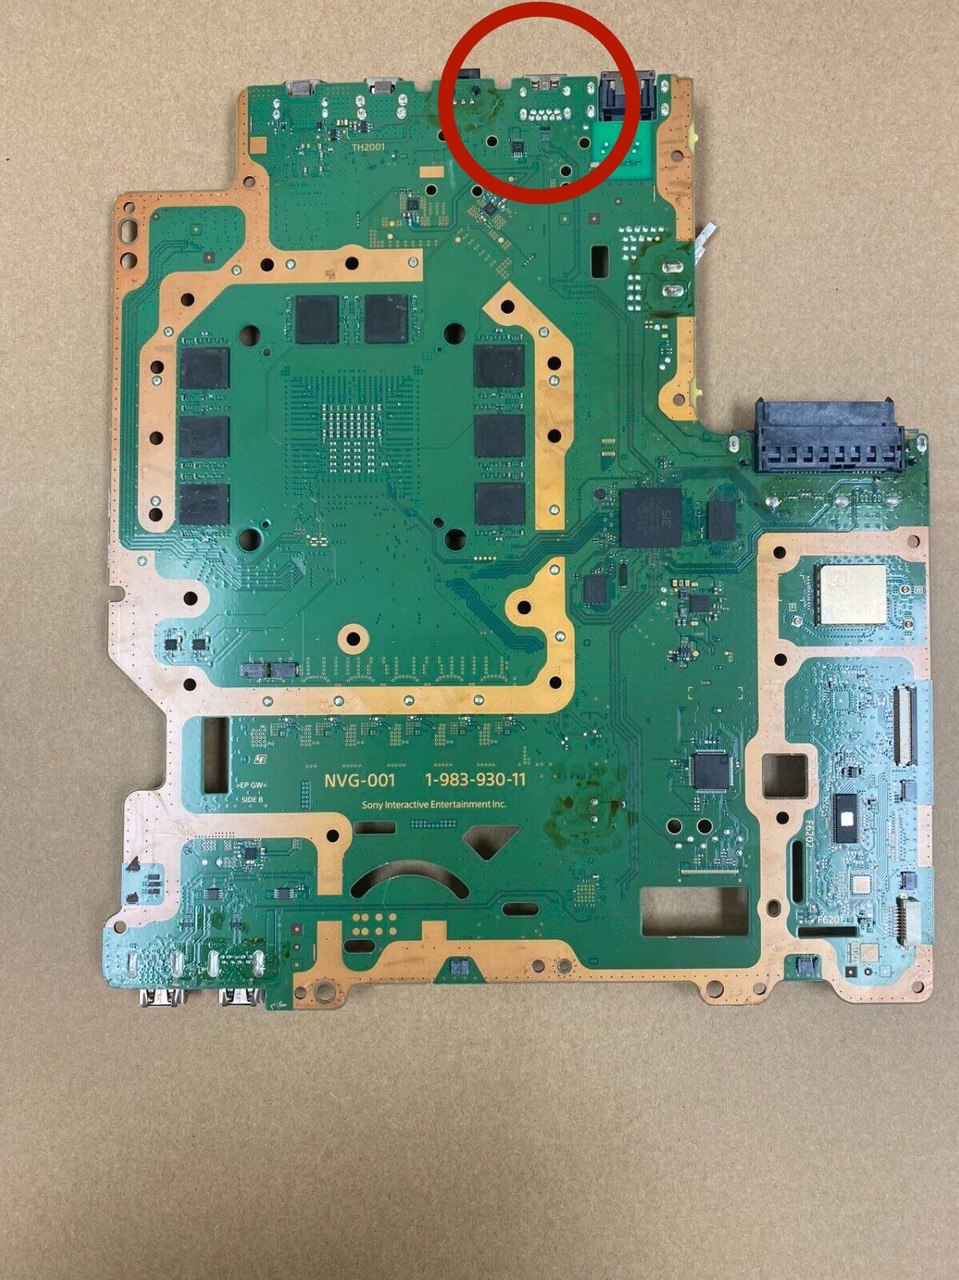
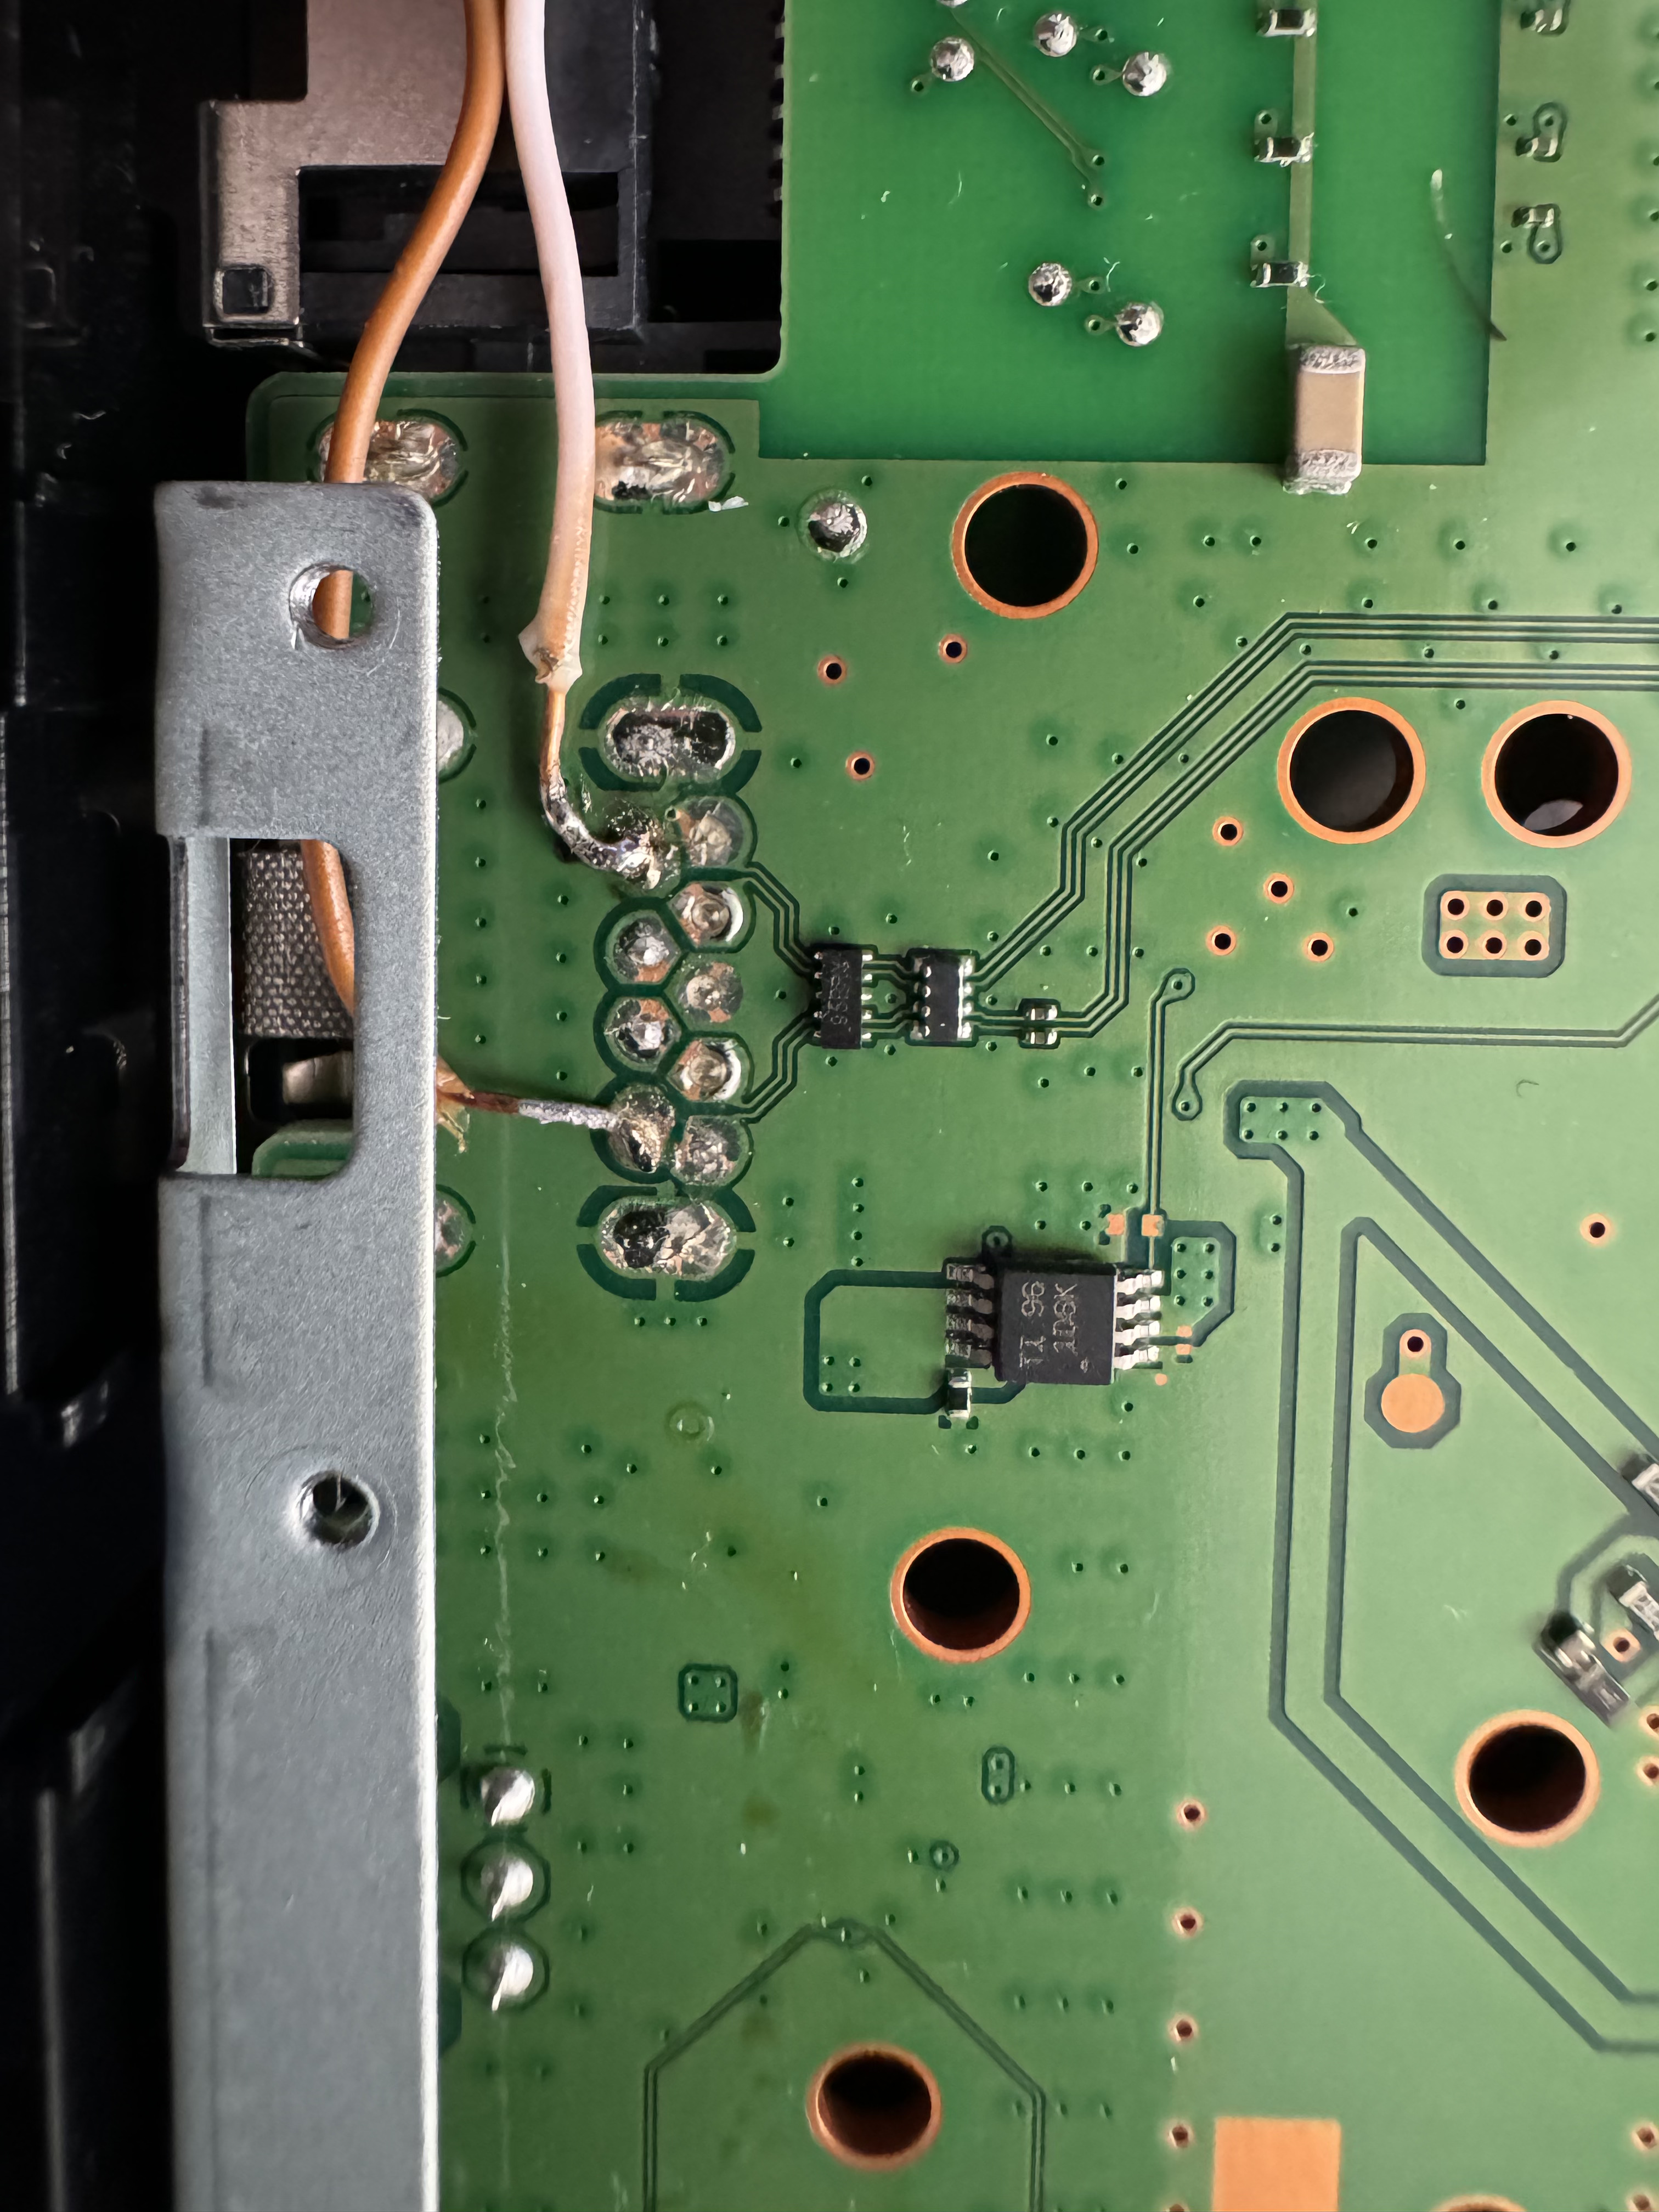
- All that's left is to get power for the LuckFox chip. We will take this from the rear USB marked in the red circle on side B of the motherboard. The connections would look like this:
- To properly place the wires, we need to pass them under the metal plate as indicated in this diagram:
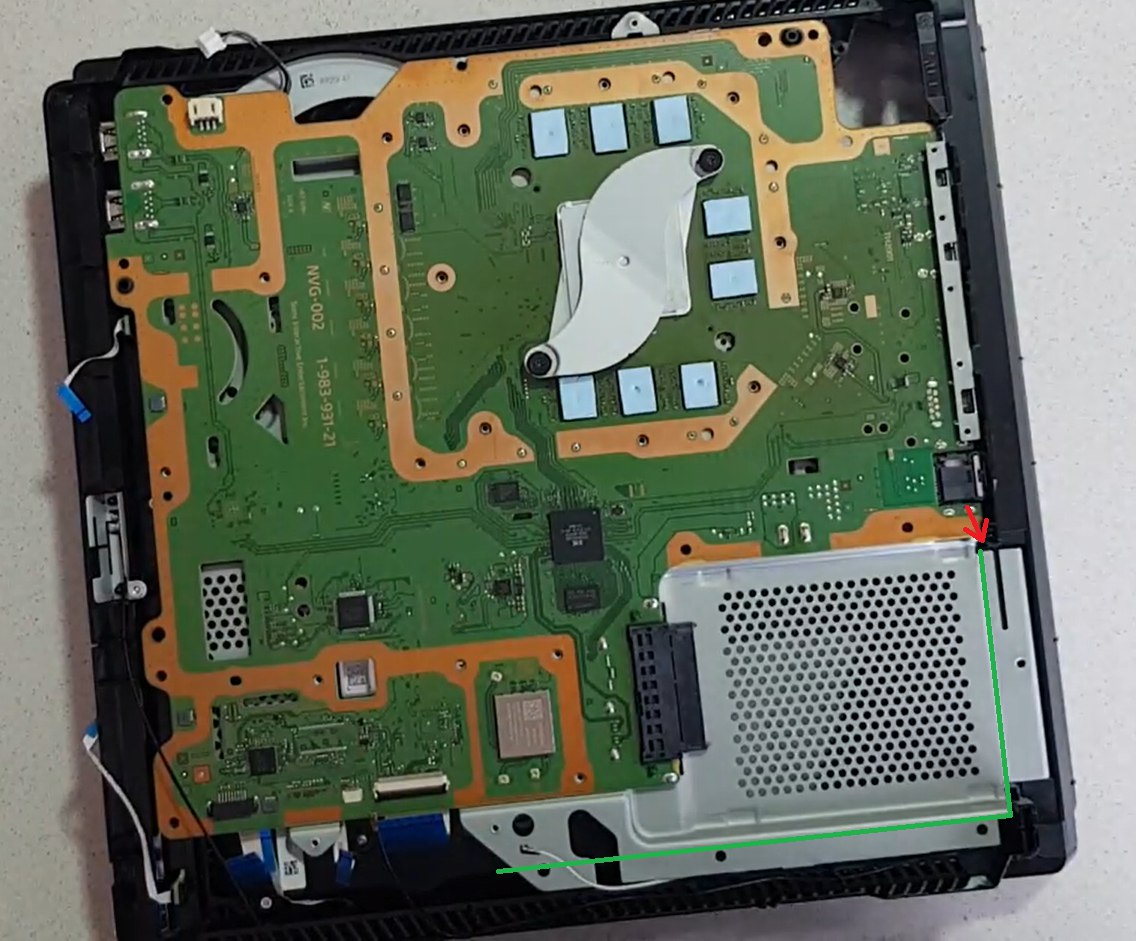
The red arrow indicates where the wires enter the rear of the metal plate, the green lines indicate where the wires are hidden under the metal plate.
This is the real image of how it looked in his console:
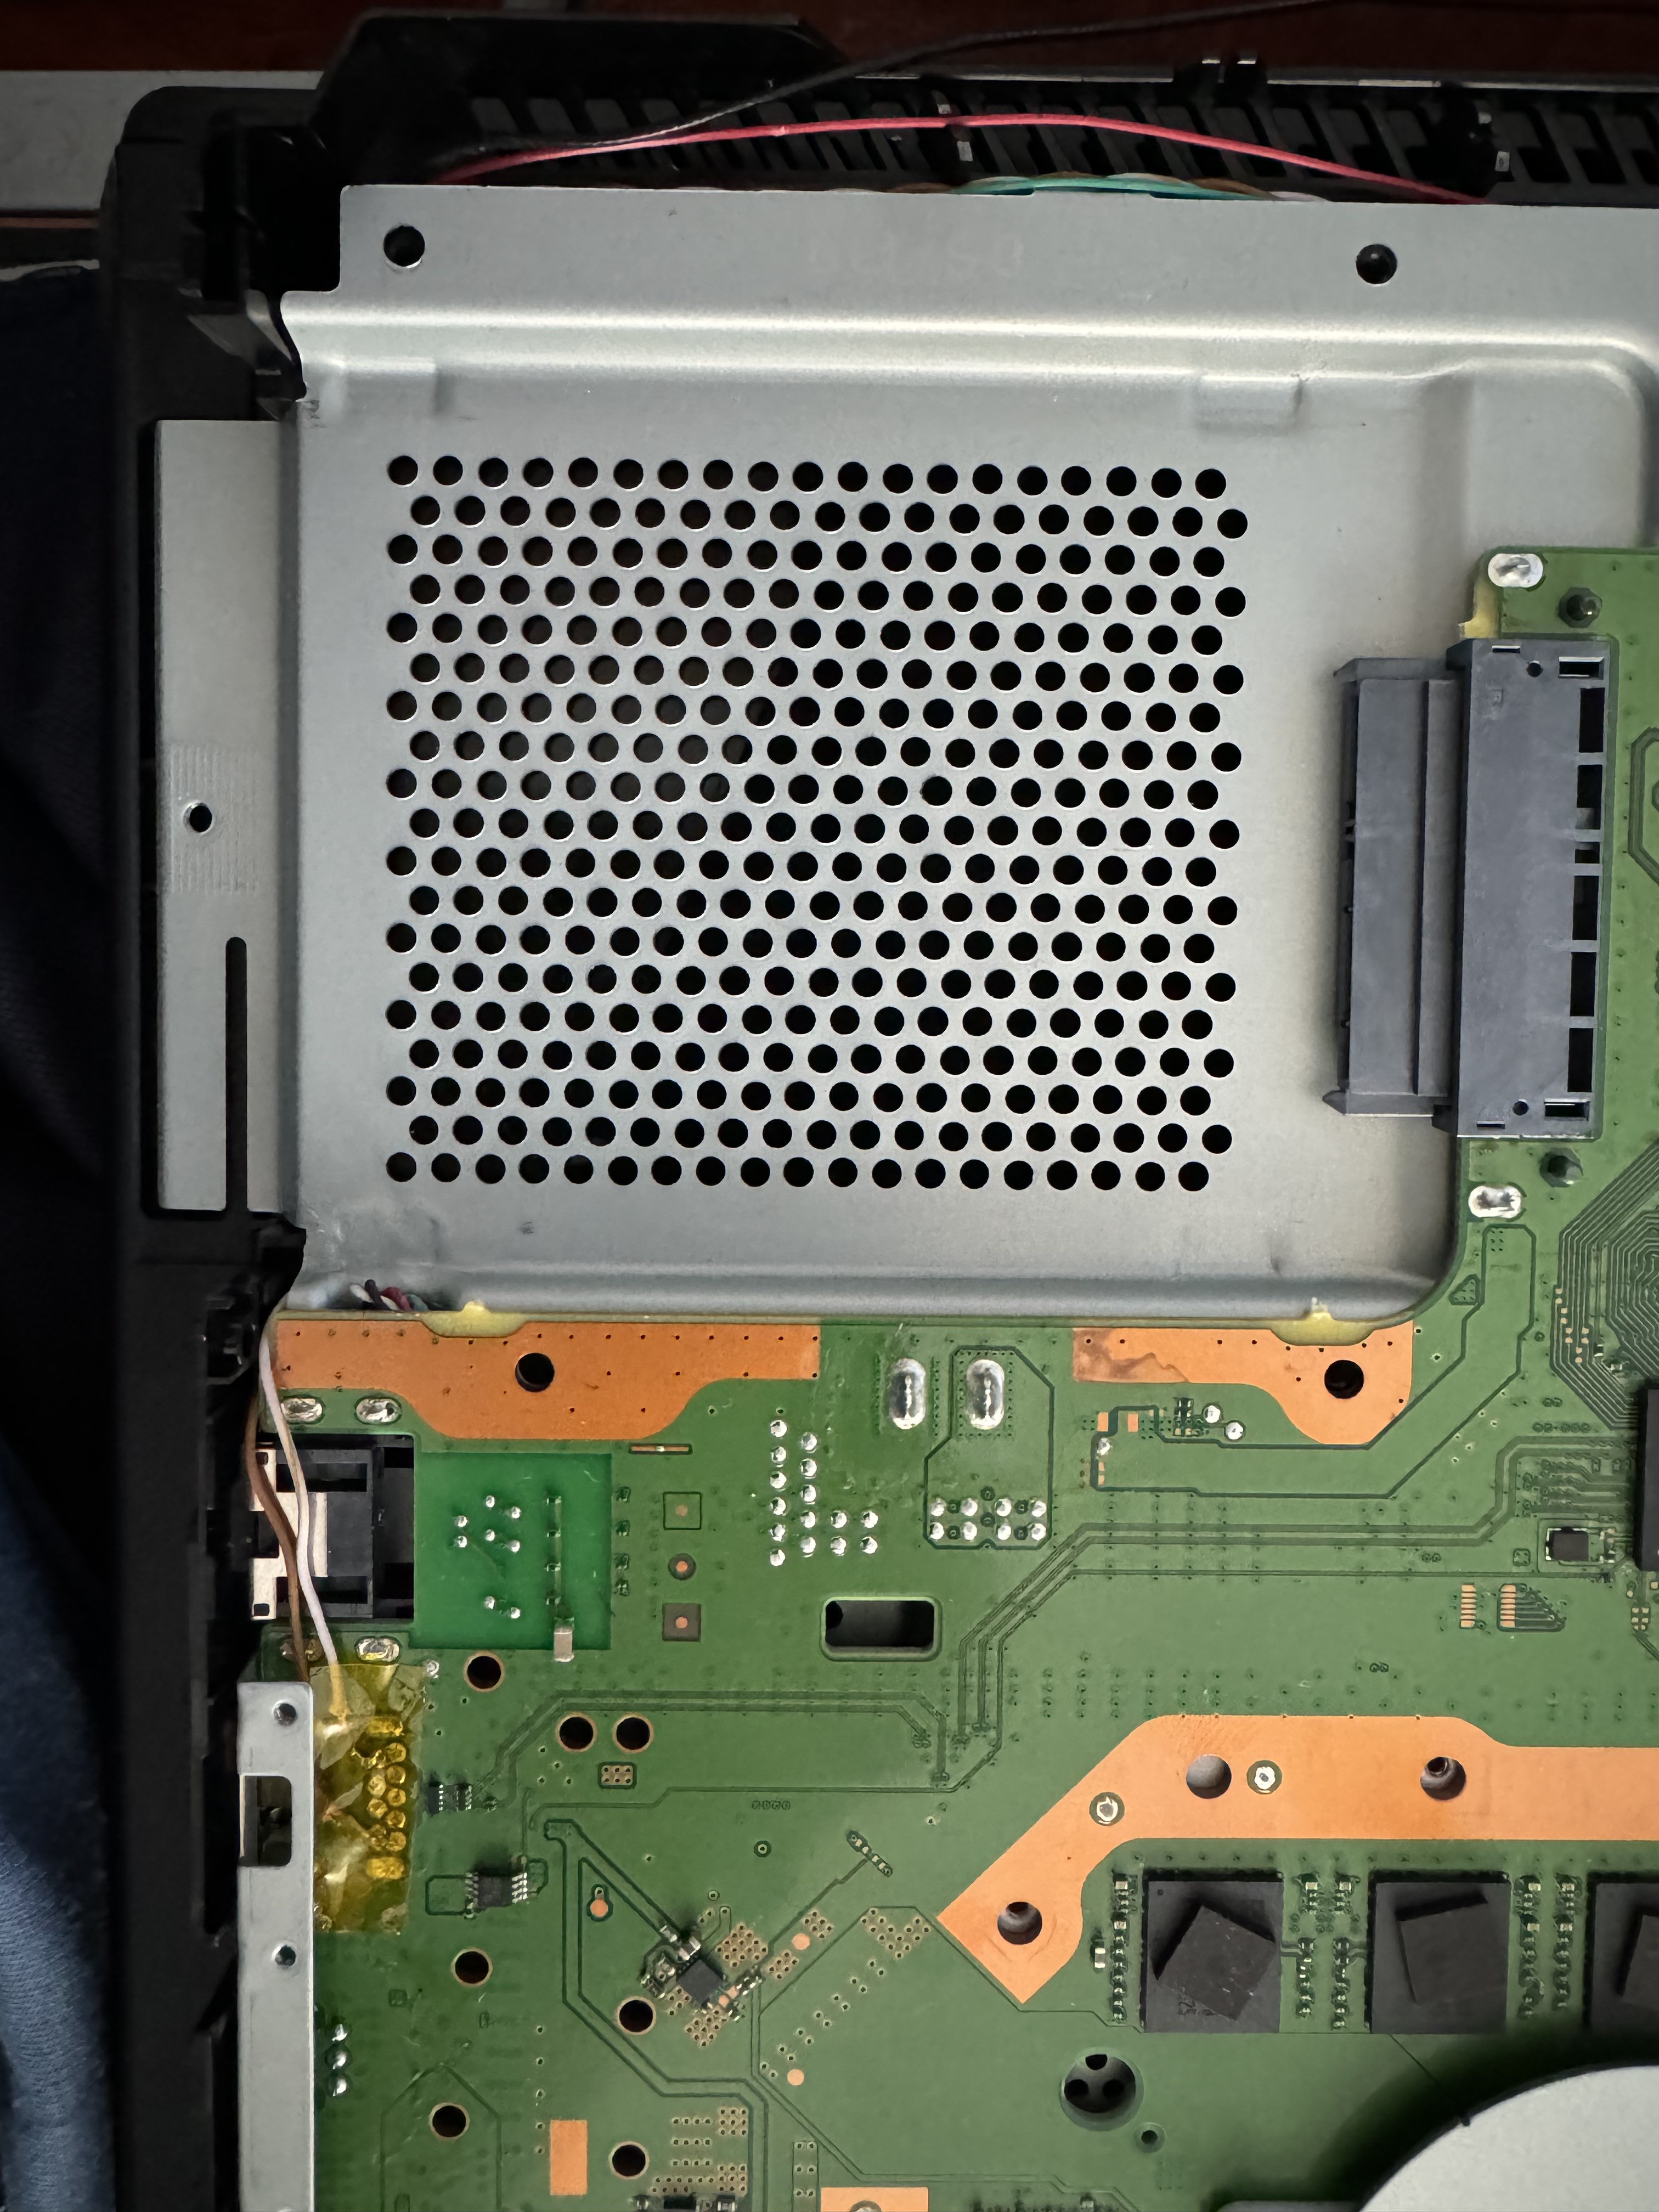
- At the back, the wires pass close to the edge of the power supply bay as seen in this image:
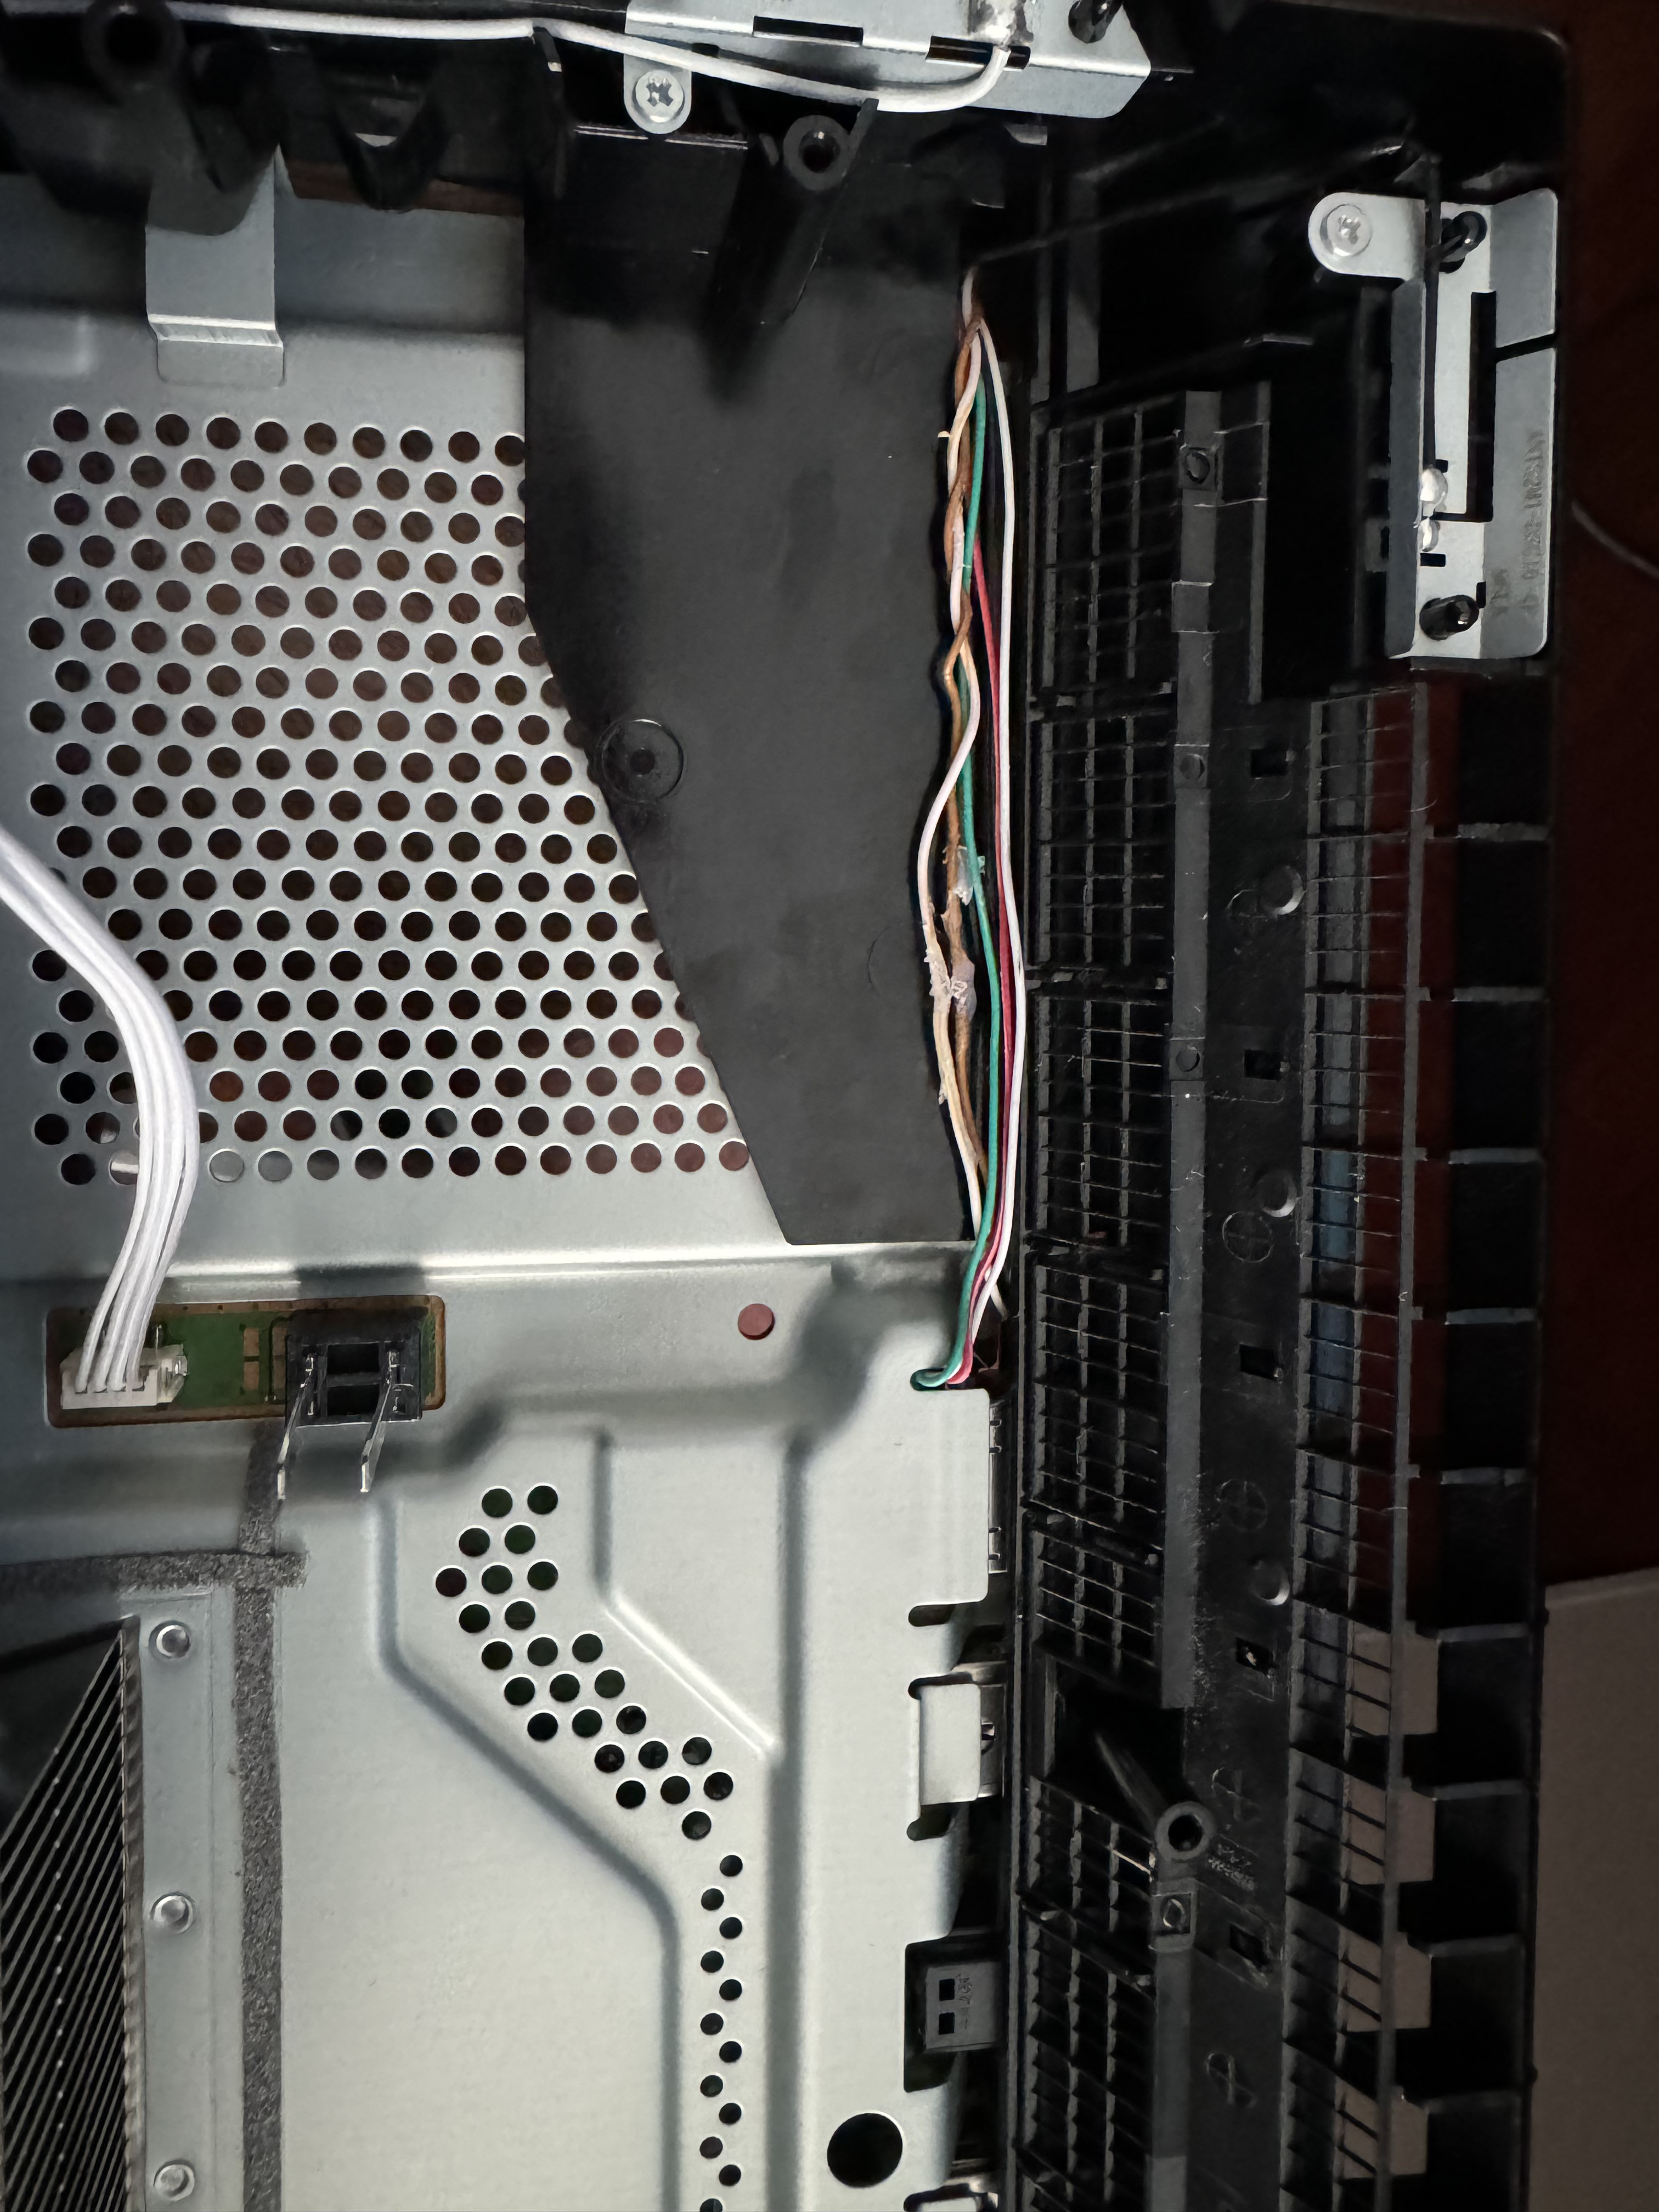
- The wires pass next to the hard drive tray as shown below:
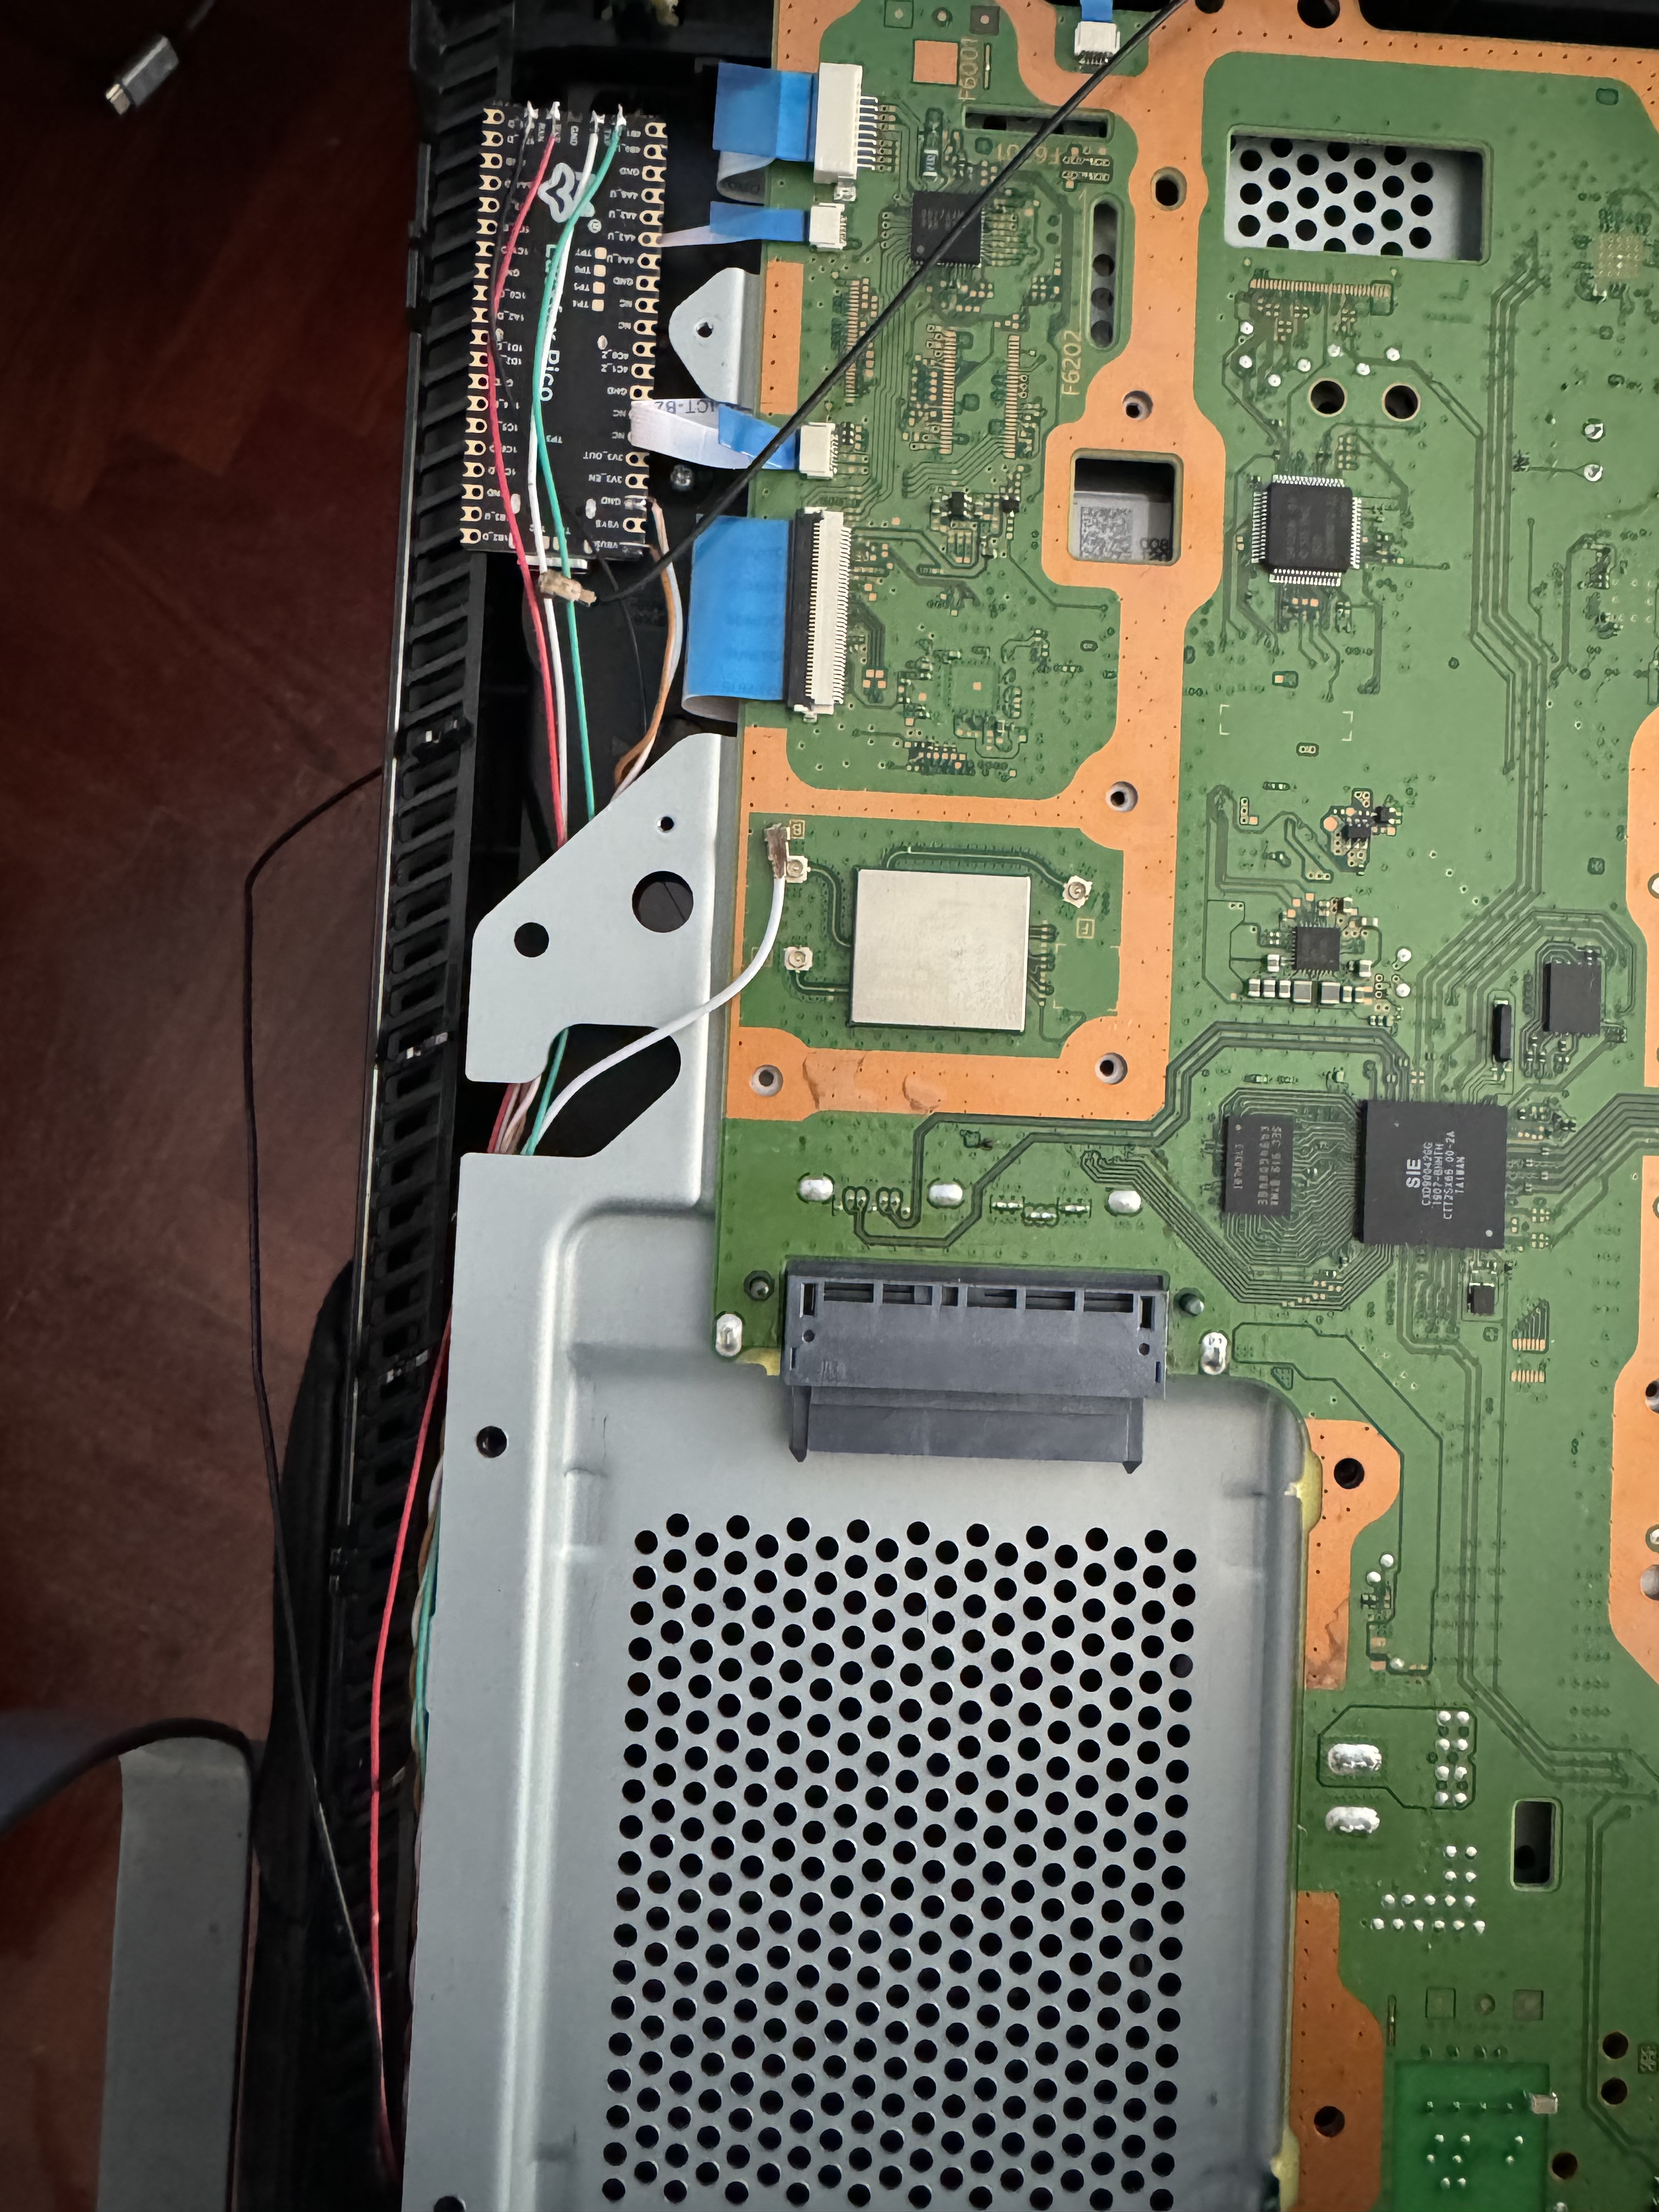
- In this image, you can see the connections closer to the LuckFox board and also the position where it will be located:
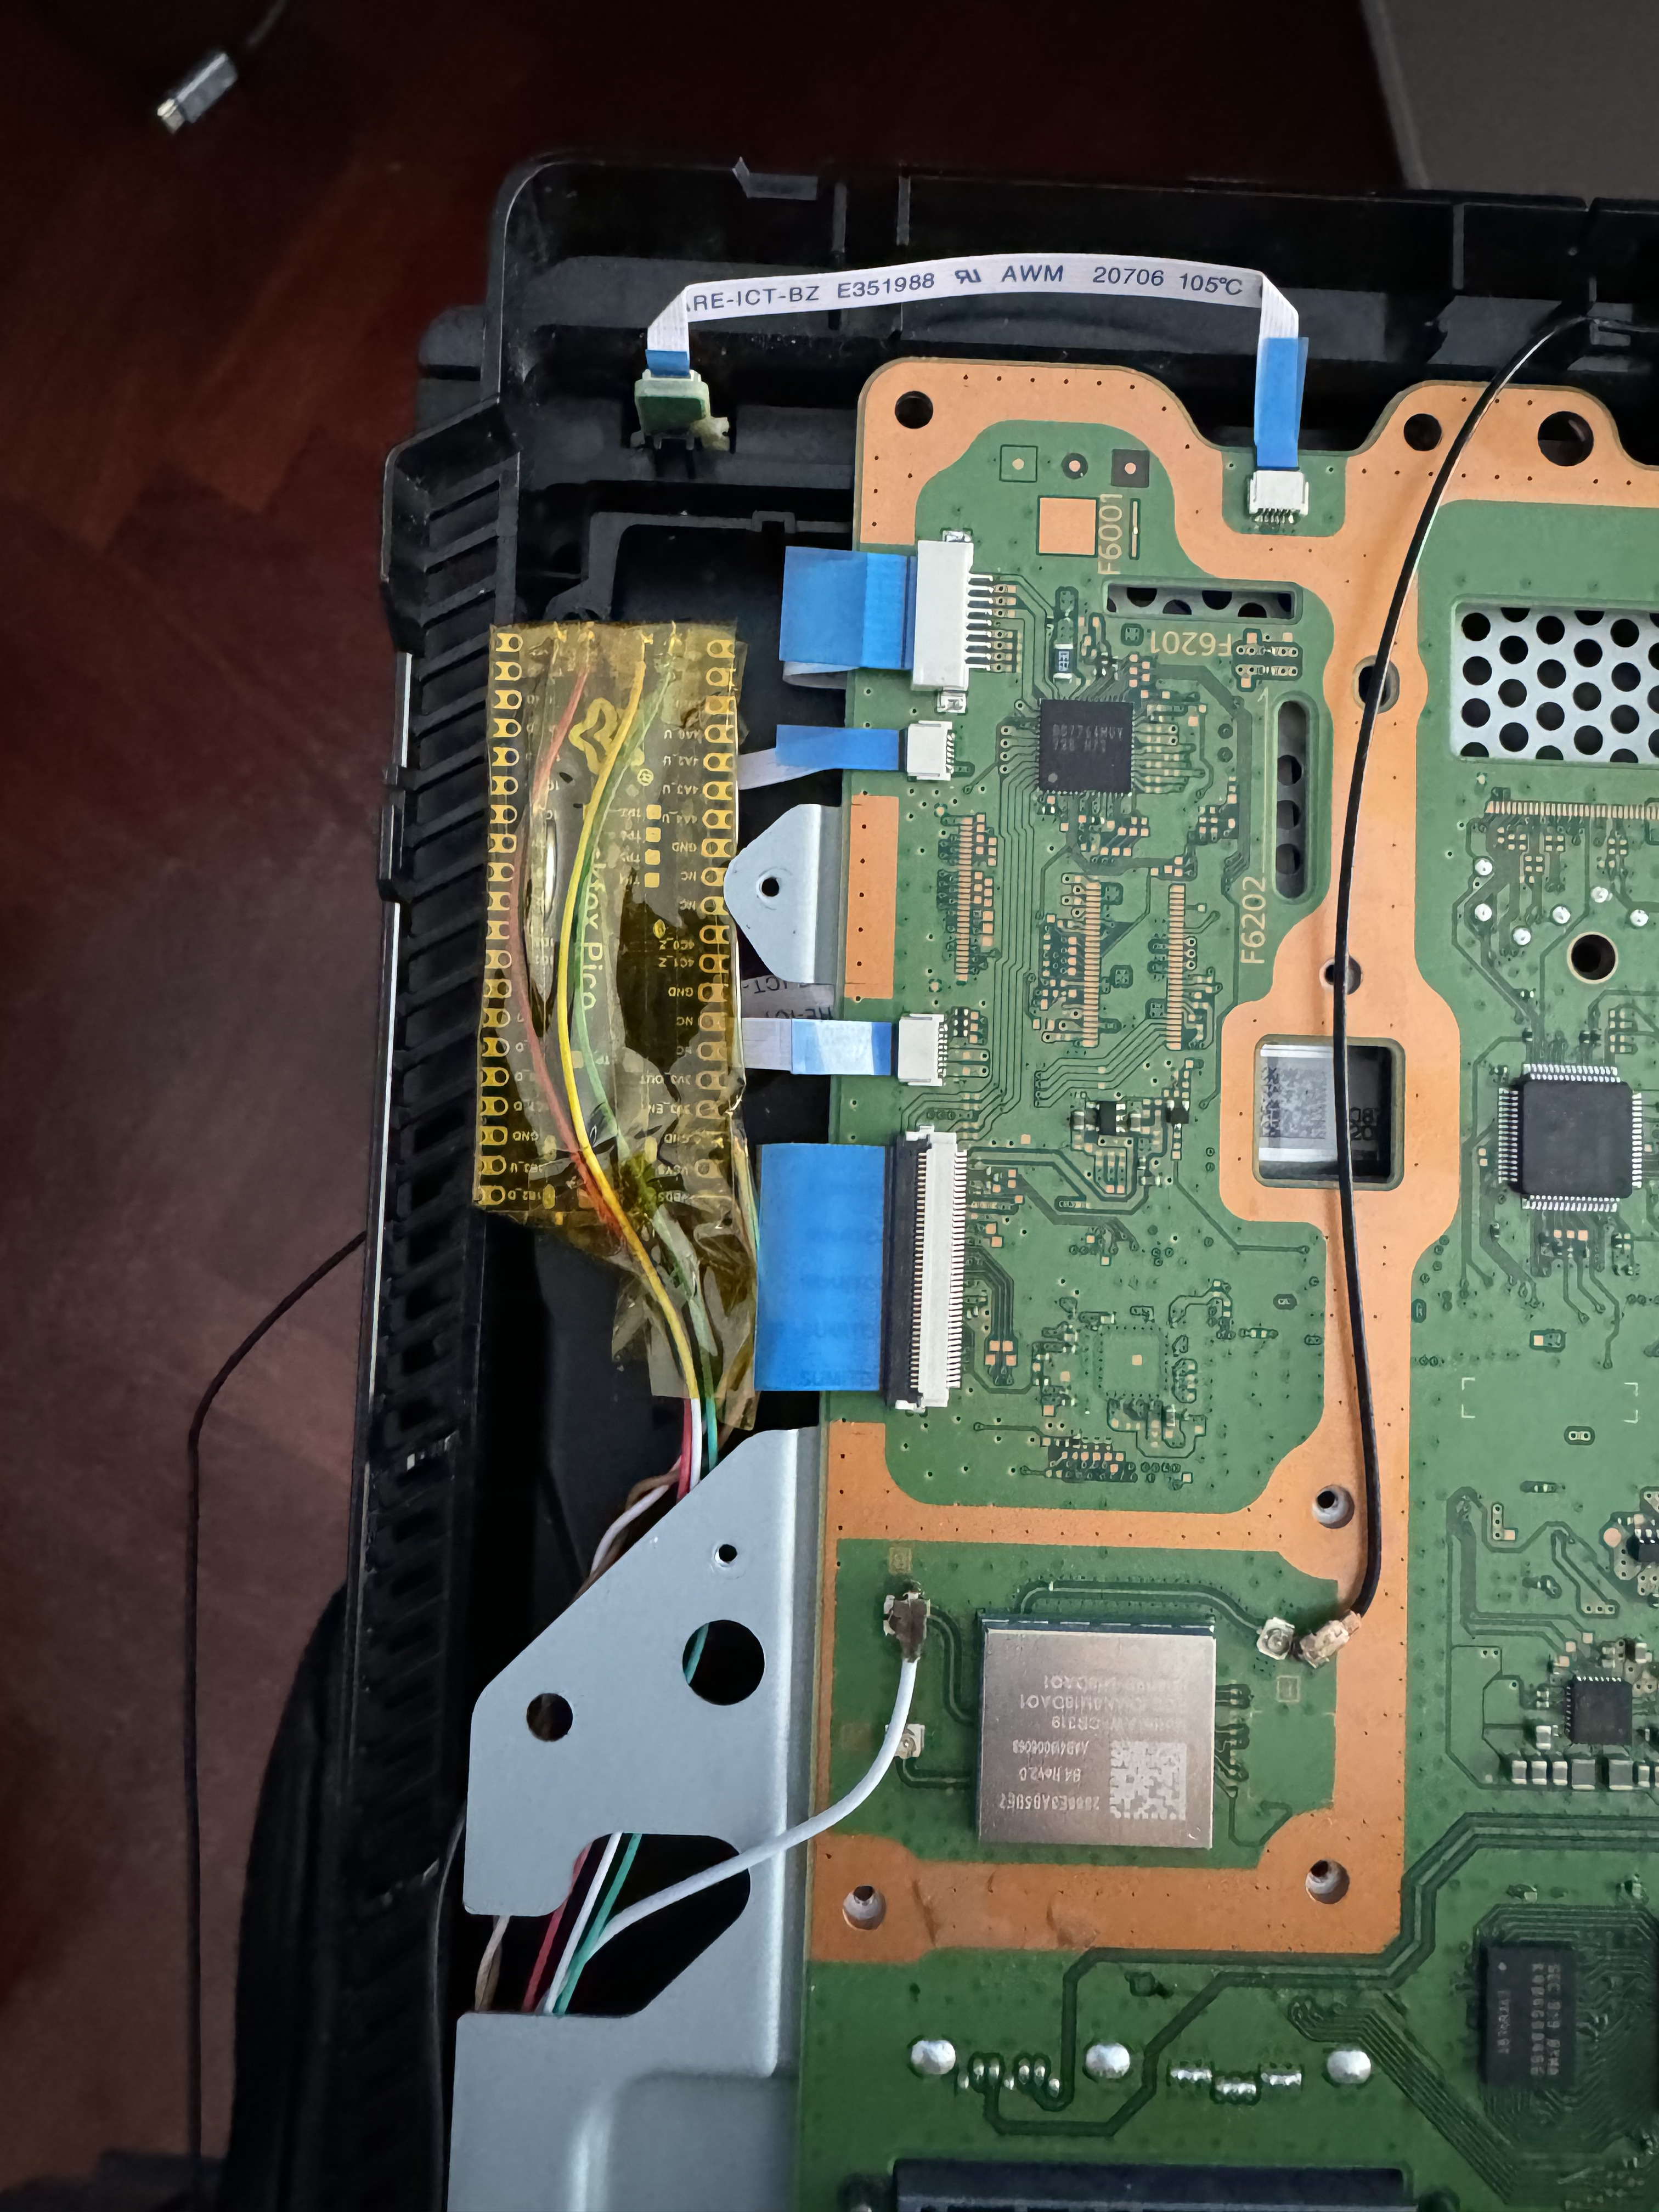
- I also covered the board and its connections with thermal tape to avoid any unwanted contact that could cause a short circuit:
- Finally, the final installation would look like this with the top metal plate already in place.